Jupyter Notebook Cloudera CSD
Running a Jupyter Notebook is as simple as executing jupyter notebook, assuming you have the
libraries installed: pip install jupyter.
Doing this in a different environment (a Hadoop cluster) is basically the same. It requires a little bit more of sys admin experience (not much if you use the right tools) but problems really start when you don’t have admin access to the cluster nodes.
Some of the new ways of running a Jupyter Notebook use the Anaconda Parcel which is basically the Anaconda Distribution packaged in a different format so Cloudera manager can installed.
The “problem” with the parcel is that it only includes the libraries it doesn’t manage services (start, stop, restart). So the parcel is great if you already have a notebook server (maybe a multi-user Jupyter Hub server) that has access to the cluster and all you are missing is libraries for your Spark job.
Note that there are multiple solutions: Hue, Zeppelin or others, the Parcel works great with all of those since it will give you the libraries independent of the service.
Ok, what if you have no notebook server and just want a simple Jupyter Notebook server to have the same experience you have in a laptop.
A quick Google search on Cloudera + Jupyter Notebook will give multiple results on how to run a Jupyter Notebook in a Cloudera Hadoop cluster.
- http://blog.cloudera.com/blog/2014/08/how-to-use-ipython-notebook-with-apache-spark
- http://www.cloudera.com/documentation/enterprise/5-5-x/topics/spark_ipython.html
- https://blogs.msdn.microsoft.com/pliu/2016/06/19/run-jupyter-notebook-on-cloudera
Some of these solution use the Anaconda Parcel and give a set of commands to start the Jupyter Notebook server manually.
Custom Service Descriptor (CSD)
One idea that me and some colleagues had was to start (and manage) the service using Cloudera manager, it would be great to have the service in the same location as you Impala, Kudu and so on services. Cloudera makes this very easy with a Custom Service Descriptor (CSD).
My biggest surprise was while looking at their
Hello World example
is starting a python http server with python -m SimpleHTTPServer, the Jupyter notebook is basically the same!
It was very easy to change the example to make it run a Jupyter Notebook server.
Basically all is needed is two files plus one optional icon file:
./JUPYTER-1.0/
    descriptor/
        service.sdl
    scripts/
        control.sh
    images/
        icon.png
The service.sdl is basically the example on the CSD docs with some small changes:
- Require the Anaconda Parcel. This is done using the
parcelandrequiredTagsfields. Right now the Anaconda Parcel providesspark-pluginwhich is probably a copy paste error. - A helper
externalLinkso the notebook server can be accessed via the Cloudera manager UI.
This is the complete service.sdl:
{
  "name" : "JUPYTER",
  "label" : "Jupyter Notebook",
  "description" : "Jupyter Notebook",
  "version" : "1.0",
  "icon" : "images/jupyter.png",
  "runAs" : {
    "user" : "root",
    "group" : "root"
  },
  "parcel" : {
    "requiredTags" : ["spark-plugin"]
  },
  "roles" : [
    {
       "name" : "JUPYTER_NOTEBOOK_SERVER",
       "label" : "Jupyter Notebook server",
       "pluralLabel" : "Jupyter Notebook servers",
       "parameters" : [
        {
          "name" : "port_num",
          "label" : "Jupyter Notebook serving port",
          "description" : "The port number",
          "required" : "true",
          "type" : "port",
          "default" : 8080
        }
      ],
      "startRunner" : {
         "program" : "scripts/control.sh",
         "args" : [ "start" ],
         "environmentVariables" : {
           "JPY_NOTEBOOK_PORT" : "${port_num}"
         }
      },
      "externalLink" : {
        "name" : "jupyter_notebook_web_ui",
        "label" : "Jupyter Notebook UI",
        "url" : "http://${host}:${port_num}",
        "secureUrl" : "https://${host}:${port_num}"
      }
    }
  ],
  "rolesWithExternalLinks" : ["JUPYTER_NOTEBOOK_SERVER"]
}
The control.sh is again the hello world example changing the execution command.
#!/bin/bash
CMD=$1

ANACONDA_BIN_DIR=$(dirname "${CDH_PYTHON}")
export PATH=$ANACONDA_BIN_DIR:$PATH

case $CMD in
  (start)
    echo "Starting the Jupyter Notebook on port [$JPY_NOTEBOOK_PORT]"
    exec $ANACONDA_BIN_DIR/jupyter notebook --no-browser --ip 0.0.0.0 --port $JPY_NOTEBOOK_PORT
    ;;
  (*)
    echo "Don't understand [$CMD]"
    ;;
esac
The only thing to note here is that I know that the Anaconda Parcel exports the CDH_PYTHON environment variable.
Thats it! just package the CSD into a jar following the documentation and upload it to the Cloudera manager instance.
How does it look
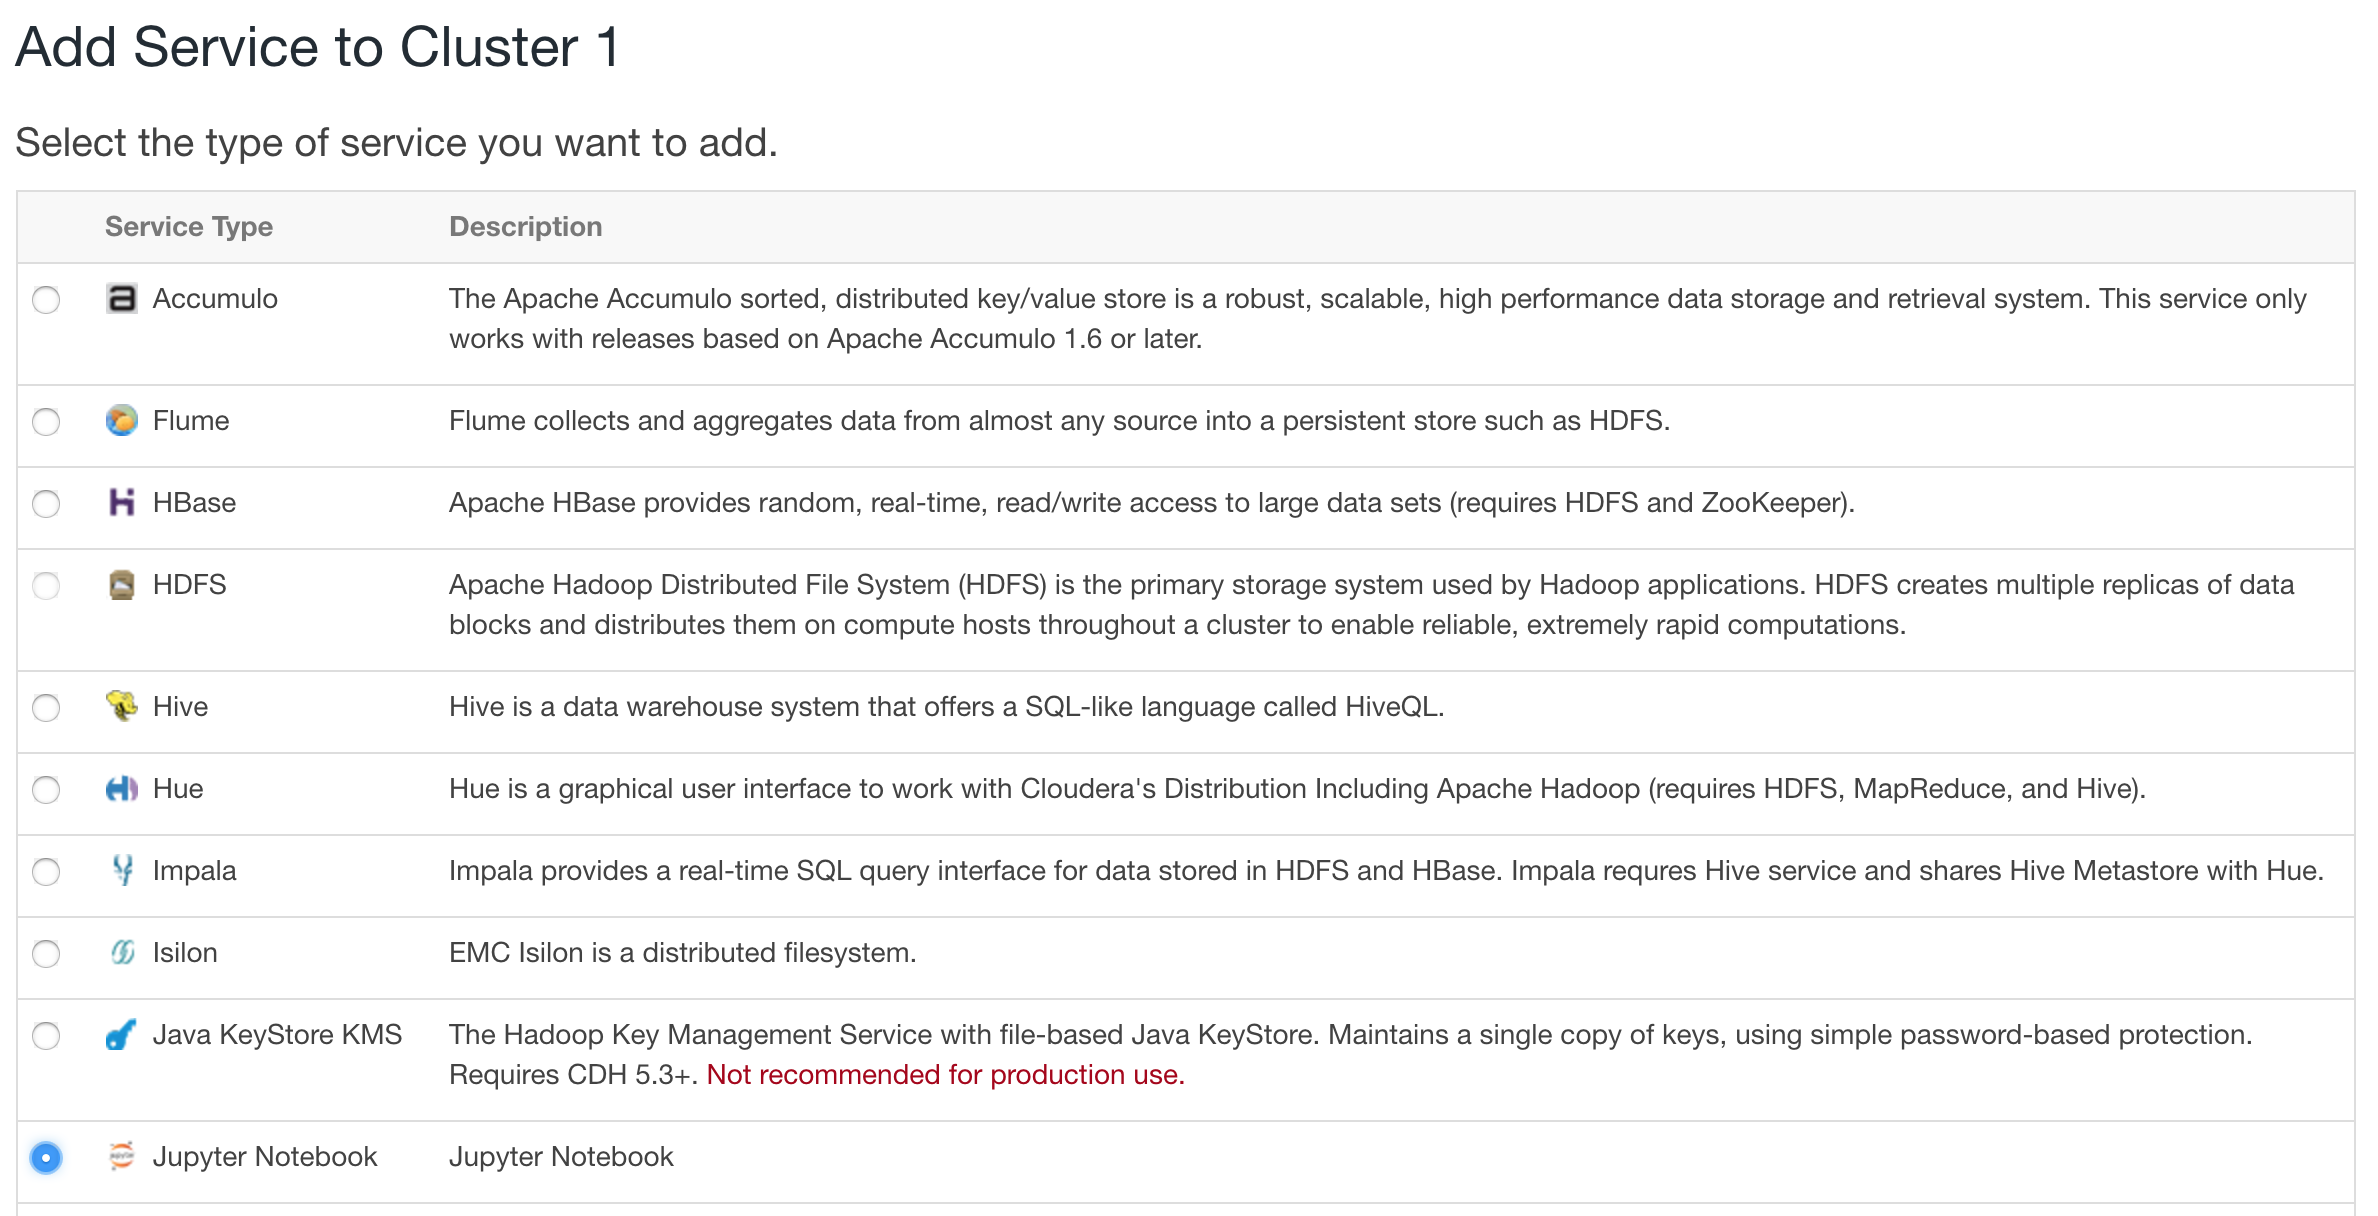
In a brand new Cloudera manager cluster you can add “Jupyter Notebook” as a new service:
As a regular service in Cloudera manager you can select on which node to install it:

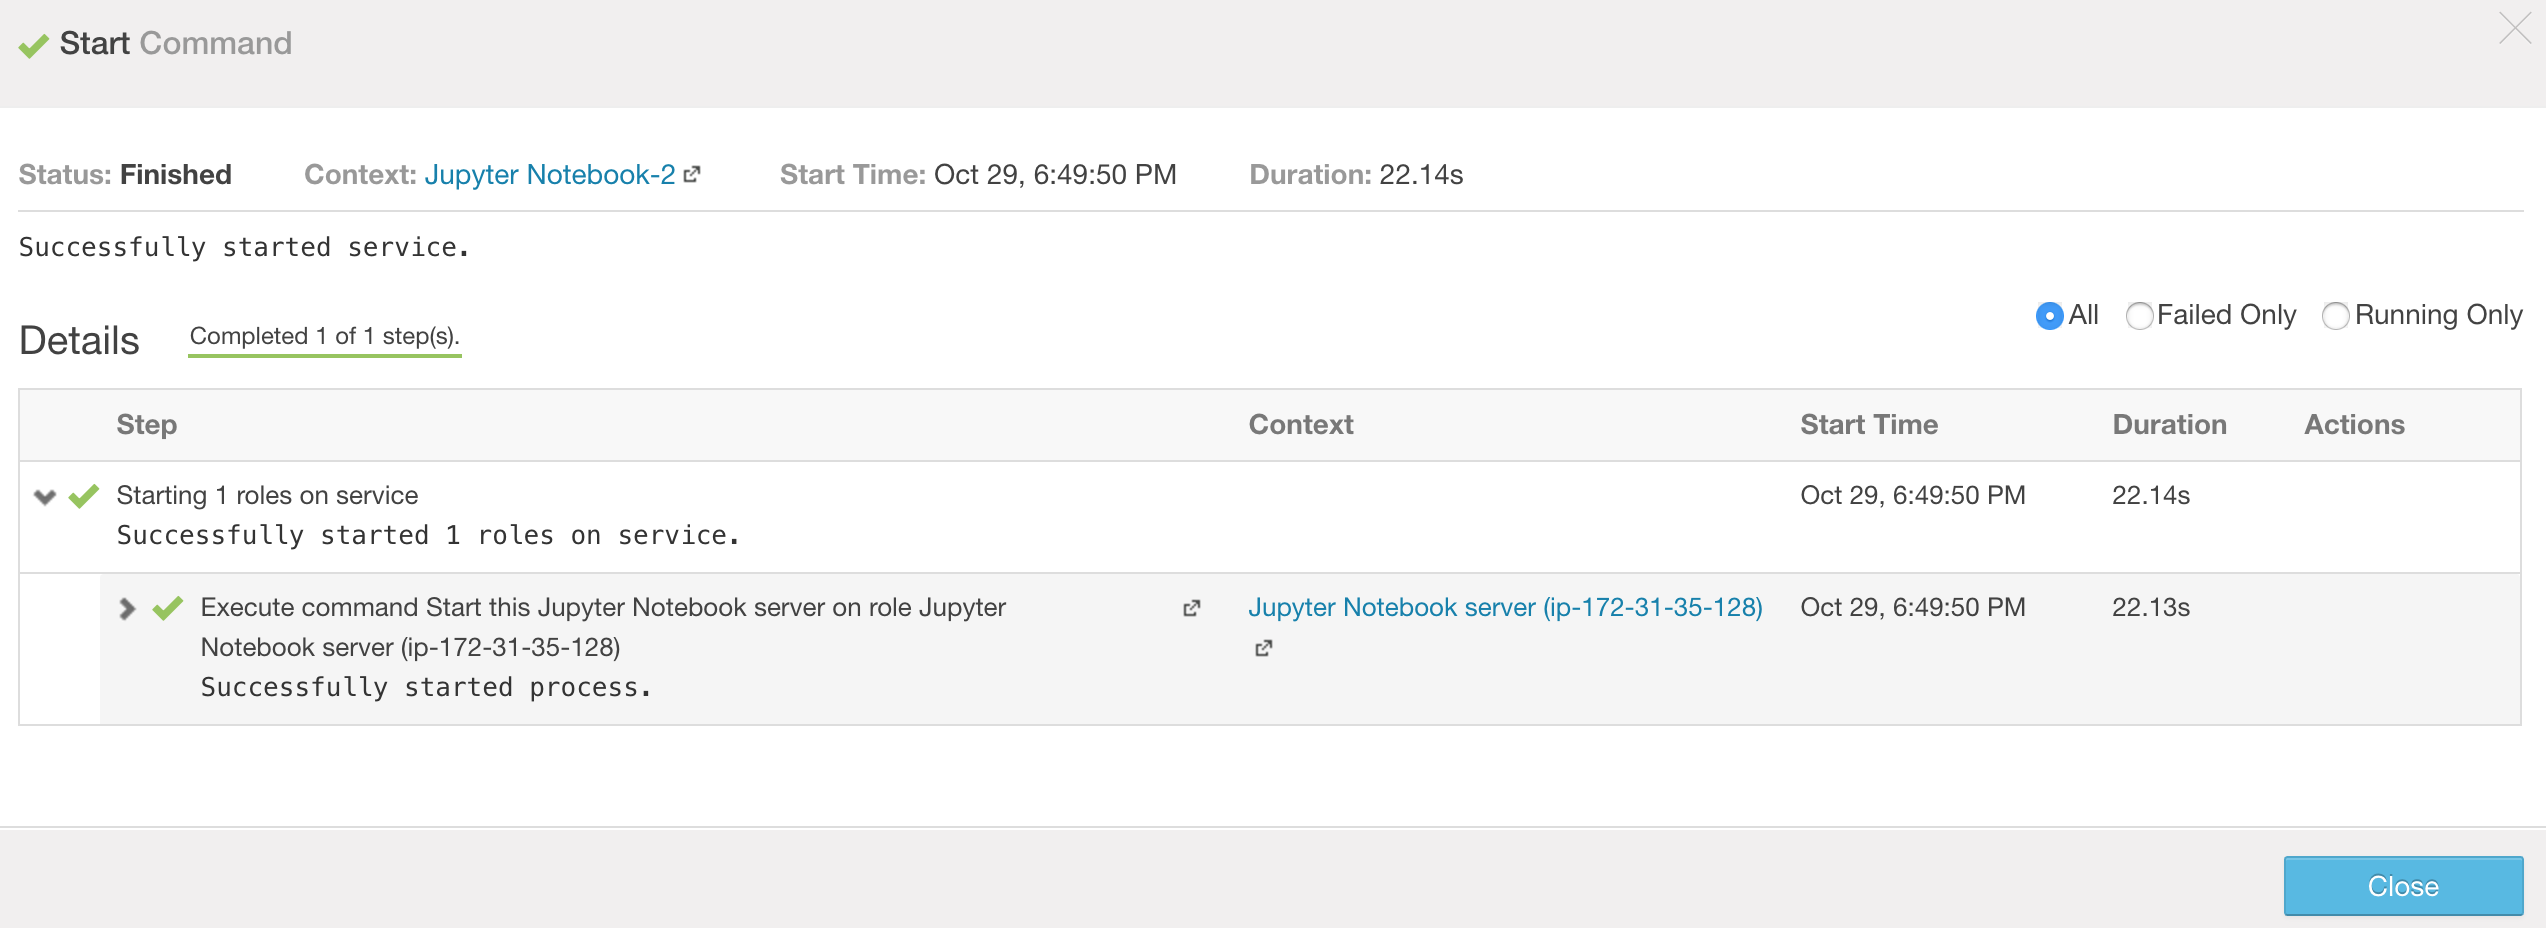
Start the service and wait for it to be successful:
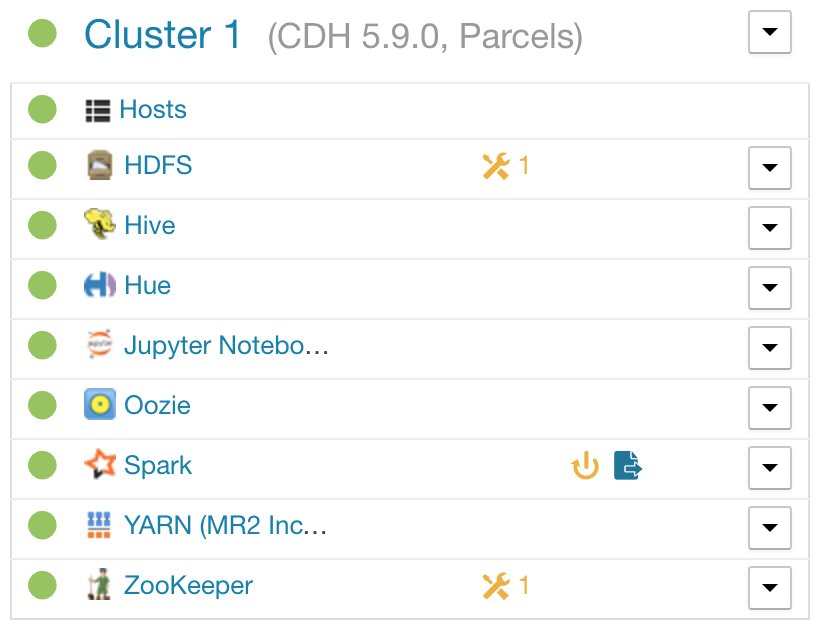
Then its possible to see the service in the service list:
Finally you can see the link to the notebook server on the service page:

That link will take you to a regular Jupyter Notebook server managed by Cloudera manager.
Conclusions + future work
CSD are very easy to write but a little annoying to develop, its all good tho.
Using this method you can get a simple Jupyter Notebook server that is managed by Cloudera manager. One big advantage of this method is that you probably already have a Cloudera cluster running and you don’t have to worry about admin/root access to a cluster, as long as you have access to Cloudera manager.
A nicer solution to have auth around the notebooks would be to start a Jupyter Hub server. This is not possible with the current Anaconda Parcel since the library is not part of the distribution.
Modifying the Anaconda Parcel is currently not possible since unfortunately is not open source but most of the tooling and documentation is so its more a matter of putting the pieces together.
Running the Jupyter Notebook server in the cluster has advantages and disadvantages but its not a requirement. Awesome tools like Livy make it very easy to run the notebook locally and connect to a running spark cluster.